VFX Software Shoot-out: Fusion vs Smoke vs Nuke
“Whether Fusion will start to erode the customer base of Smoke and Nuke is debatable. I suspect that in the long term it may, but in the short term, a new group of users – previously unaccustomed to the power of node based compositing – will download the free version. They’ll play with it, learn it, like it and use it.”
ADAM GARSTONE reviews the latest versions of VFX software for Smoke, Nuke and Fusion especially in the light of the mighty Blackmagic Design’s recent buy-out and pricing policy.
When Blackmagic Design bought compositing system developer eyeon Software, pretty much everyone expected them to do something scary with its main product, Fusion. For sure, the price would be coming down and, as Blackmagic supports the Mac with almost every product, we could expect a port to that platform.
Fusion 7 – slightly restricted and still in its Windows incarnation – is now free to download from the Blackmagic website, and free, at least to its competitors, is pretty scary.
Smoke
In some ways, Autodesk started the ball rolling with Smoke for Mac 2013, dropping Smoke’s price from over £10,000 to £3,300 and simplifying the user interface – while maintaining the flexibility for hard-core users. A few months ago they released Smoke for Mac 2015 with a yearly subscription price of £1280 (ex VAT) or monthly at £160 (again, ex VAT) – handy for those people who have a quick compositing job but don’t need it every day.
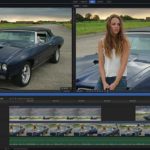
Smoke for Mac aims to make compositing and finishing easier for editors. Whilst Smoke remains a very complex compositing tool, many tasks can be completed from an edit-friendly timeline – including, of course, editing. You can import an edit using XML (FCP 7 and X), AAF or EDL and motion effects, dissolves, basic wipes and so on are reproduced in the imported sequence. The Timeline tab presents an interface familiar to any editor – two ‘monitors’ (source and sequence) with a timeline below and media on the left. Between the monitors and the timeline is an effects panel (the FX Ribbon), presented as a left to right flowchart – your raw clip is on the left, the final output is on the right and effects are in between. Applying an effect to a clip adds it to this ribbon, from where you can tweak the basic parameters. Click on the big ‘Editor…’ button and you are hurled into the terrifying world of nodes.
“Whether Fusion will start to erode the customer base of Smoke and Nuke is debatable. I suspect that in the long term it may, but in the short term, a new group of users – previously unaccustomed to the power of node based compositing – will download the free version. They’ll play with it, learn it, like it and use it.”
Smoke for Mac 2015 has extended what you can do in the timeline – giving you more powerful capabilities before you need to drill down into this traditional and complex Smoke interface. In the FX Ribbon, Axis effects have gone, to be replaced with Action. The Action node allows Axis transforms (so you haven’t lost those) plus lens flares, camera control and lighting. Other FX Ribbon effects include a quick 2D transform tool and masks.
 Smoke for Mac 2015 has extended what you can do in the timeline – giving you more powerful capabilities before you need to drill down into this traditional and complex Smoke interface.New For 2015
There has always been an odd omission from Smoke’s capabilities – it was strange to have a full 3D compositor that didn’t have any form of built-in 3D tracking, so Smoke 2015 now includes a point-cloud based 3D tracker. This requires you to step away from the comfortable Timeline view and enter the Action Schematic. However, it’s very simple to use – just drag an ‘Analyzer Mono’ node into your schematic and run the analysis. There are various options to fine tune the resulting track. Compositing in a tracked object is as simple as clicking the button to generate an Axis from one of the track points, or a Locator from several points. Connect your foreground item (for example a 3D model or 2D image) to the resulting node in the schematic and Bob’s your Uncle – well, once you’ve done a bit of scaling and rotating and the like. The track seems pretty solid and the fine tuning controls are comprehensive.
Under the hood, there are optimisations for GPU acceleration and 2015 felt much faster than its predecessor. In Smoke 2013, Timeline effects were different code to the more powerful node based effects. This has been rationalised in 2015, so the effects are the same – which should make the software more stable and the translation between FX Ribbon parameters and node parameters more accurate.
 What you do get with the free version of Fusion is an extremely capable 3D compositing and rendering solution.
Fusion
Blackmagic’s first release of Fusion 7 splits the product range into the free version, and a ‘Studio’ version at $995.
The free version is limited to outputting Ultra HD (the Studio version is resolution independent) and excludes Generation – a tool for managing projects across multiple artists, with asset tracking, versioning and task assignment. It also excludes the Avid plug-in that allows Fusion integration with the Avid timeline. Other notable omissions are optical flow for speed changes etc, remote rendering and Stereoscopic 3D.
What you do get with the free version is an extremely capable 3D compositing and rendering solution. It lacks Smoke’s NLE timeline, so you are plunged straight into node based composition, but the tool set and user interface are clear and relatively quick to get started with.
The standard window layout has a couple of viewers at the top, an area below for building your node schematic, and an area to the right which shows the controls for the currently selected node. I really like this dual viewer approach. It’s possible to do the same in Smoke, but Fusion’s implementation has a simple, practical immediacy. Select a node and hit ‘1’ on the keyboard – that node’s output appears in the left viewer. Select another node and hit ‘2’ to see its output on the right viewer. It’s great for quickly seeing the effect before and after a node, for instance when colour correcting.
To apply effects to a clip, you simply add a Loader node to the schematic and point it at your video clip. Next add an effect node – for instance a blur – and draw a connection from the output of the Loader to the input of the blur. As described, you can look at the Loader in one viewer and the blur node in the other to see the effect. Simply adjust the blur parameters in the right hand window.
To output your effect you’ll need a render (if you’ve done any 3D stuff) and output node. It’s worth noting that everything in your schematic must be connected to the render and output nodes through merge nodes – unlike other compositors where anything in the schematic is ‘in’ the scene. Although this may seem to make the schematic more complex, it explicitly defines ordering, and shows the flow of image processing very clearly.
Unlike Smoke 2015, Fusion doesn’t include a point cloud based, 3D tracker, though it will import the data from a third party tracking solution. There is a 2D tracker, which works very well indeed but, as with Smoke 2013, it’s a slightly odd omission from a 3D compositing tool.
Animation is straightforward – right click on any parameter and select Animate then set key points as required. You can also connect parameters to other parameters by right clicking, for instance you could do a four corner track of a TV screen and connect the corners of a corner-pin warp effect to the four tracks for instant screen replacement. This connection is made more powerful by the use of expressions, which allow you to use other controls as variables in custom formulae.
The free version of Fusion has all the stuff that you would expect – particle systems, powerful 2D and 3D text nodes, and a Paint node, but there are a few nodes that are only available in the Studio version that I find very useful – all based round optical flow processing. Firstly, there is an Optical Flow node, which calculates motion vectors (backwards and forwards) for the input video. As this is ‘computationally intensive’ – i.e. very slow – it’s best to pipe the Optical Flow node straight to an output node and render out an Open EXR file (which stores both the image and the motion vectors). You can then use this file as the input for any optical flow processing you would like to do. For instance, the Time Speed and Time Stretcher tools – which retime your clip – will use the motion vectors to interpolate new frames, which generally gives a much better result than the usual frame blending techniques. Another nice node is Tween, which calculates frames between two references – recreating a glitched frame or creating missing frames, a little like Avid’s Fluid Morph transition. A related tool is Repair Frame which can repair scratches and dust.
This Fusion Studio toolset also calculates disparity maps between left and right cameras for manipulating stereo 3D.
Nuke
Nuke v9 is available in three packages. Nuke is the core compositing software, Nuke X adds the good stuff, like a particle system, optical flow processing and 3D tracking. Nuke Studio is closest in concept to Smoke 2015, with basic editing functions on a timeline. Similarly to Smoke you can add effects to clips in the timeline and then drill down into a full node graph if you need more control. Similarly, there is support for conforming timelines from other NLEs, making Nuke Studio a powerful compositing and finishing solution.
Nuke is available for Windows (7 and 8, 64 bit), Mac (10.8 and 10.9) and Linux (CentOS/RHEL 5 and 6). The Foundry state that Nuke won’t work under Yosemite – I tried it and they are completely correct.
Just as Nuke Studio has many similarities to Smoke 2015, Nuke X is very similar to Fusion. The way that the nodes are built into a network is very similar, with merge and render nodes for instance – even many of the node names are similar. Once again, I found the node tree in Nuke very intuitive. Smoke tends to pack a very great deal of functionality into every node – making their controls very complex. I prefer Fusion and Nuke’s approach – using nodes with more defined functions, even if it means that the tree you need to build is more complex. As with most things, of course, it’s a matter of personal preference, and power users will see benefit in both approaches, but for a first-time, or ‘casual’ user, Fusion and Nuke’s learning curve is less precipitous.
Where Nuke really stands out is in tracking. There are three tracking options, a 2D point tracker, a 3D, point cloud tracker and a planar tracker, similar to Mocha. The 2D tracker was improved and simplified a couple of versions ago and is excellent. Tracking points can be easily keyframed to allow for occlusions or the track point going out of frame and, once you have a track you are happy with, the node ‘outputs’ a transform node with the tracking data referenced in the transform coordinates. Anything you attach to this transform node will follow your track. Even better, you can output multiple transform nodes from a single tracking node, for instance one node could be a simple translation track and another could be a four corner pin. Once again, this approach clearly shows, in your node tree, what is being tracked and what is following that track. Fusion’s 2D tracker is just as good, but referencing tracking data in the ‘follower’s’ transform parameters means you can’t see this relationship in the tree.
The 3D tracker and the planar tracker work similarly. Once you have a track you are happy with, you output a node (e.g. a Camera node from the 3D tracker) and use that node in your comp. The 3D tracker is very capable and I found it very straightforward to get a clean track. There is a mask input, so you can mask out foreground movement that may confuse the track, and it’s a simple matter to select tracked points and define them as the ground plane – nice.
Nuke is (at the time of writing) £2534, NukeX is £4800 and Nuke Studio is £5600.
Conclusion
It’s strange, with three products that seem to be so similarly specified and which address the same market, that Smoke, Fusion and Nuke are so individual. Smoke’s editing timeline is excellent and gives you an easy ‘in’ to its effects – you’ll have to spend £5600 on Nuke Studio to get The Foundry’s timeline solution. Smoke’s keyer is also remarkable.
Fusion is surprisingly intuitive for such complex and capable software. It is exceptional at handling imported 3D models and material rendering, but doesn’t have any editing capabilities. It is, however, very hard to argue that it’s not good value for money.
Nuke is the most expensive, and oozes quality – if software can ooze. Licensing and installation caused me some issues, but one advantage of the price tag is the excellent after-sales support, so I was back up running in a few hours. It’s this level of customer care that has (arguably) made Nuke the de facto standard for high-end compositing.
Whether Fusion will start to erode the customer base of Smoke and Nuke is debatable. I suspect that in the long term it may, but in the short term, a new group of users – previously unaccustomed to the power of node based compositing – will download the free version. They’ll play with it, learn it, like it and use it.


