Working With Digital Film
Posted on May 10, 2010 by Alex Fice
DoP Dan Mulligan Demonstrates Through His Own Designs How Shooting Digital Film Is Increasingly Demanding New Ways of Workflow ‘Thinking’ – Pictured is a Digital negative – a raw DPX frame Here at Pinewood Studios, at the heart of the British Film Industry, Rogue Element Films have been pioneering new and efficient ways of developing workflows for our ‘Digital Cinematography’ film shoots. Over the last five or so years we have seen digital film slowly maturing into the state of play we now witness and have gained a broader understanding of how such photography should be tackled, that is, by starting with a workflow that suits your shooting scheme.
With the strong emergence of the RED system we can clearly see how important workflows are to these cameras. At this stage in time, the RED workflow is immature and is evolving through being beta tested by its many owners. This highlights how productions that are shooting digital feature films now have developed into much more mature systems. We aim to demonstrate that here with this article.
We firmly believe that the cornerstone of practically all high-end digital shoots is the workflow that you employ to not only capture the images (the easy bit) but how to develop an efficient offline/online environment to minimise the impact of controlling such huge amounts of data.
By explaining our approach to recent back to back feature films and commercial shoots we will explain developing workflows and how far they have matured in even the last year or so. Don’t forget it wasn’t so long ago that a lot of productions were confused as to the speed of disk systems required to play full HD images without dropping frames, information that is now part of everyone’s language and understanding.
 Pro Res 422 Workstation – iDock not visible capturing timecode accurate metadata DPX frames straight from the iDock DMAG into FCPThe workflows adopted here are fairly universal and can be used for most shoots but we will concentrate on a fully uncompressed 2K/HD data workflow, as used by David Fincher on his new Brad Pitt movie, The Curious Case of Benjamin Buttons, and now utilised by us and others. This style of capture is significantly high-end, due to the amount of information being captured and offlined, but it is a workflow that allows real-time playout and playback of the raw material. It also has the ability to maximise efficiency on the actual set itself with smart and quick workflow ideas. Being a real-time process the need for rendering the captured material is not there as no software wrappers are employed to store the material, making efficiency on-set that much more effective.
To illustrate, we’ve provided a definitive list of the equipment (bottom of page) used on all these recent shoots, what was used and why.
It’s important to list the equipment used to fully explain how these workflows were arrived at. Most productions could easily employ other manufacturer’s similar products but the exercise here is the workflow and the reasons for it.
The reason for using the Stwo DFR system is it’s ability to capture, completely uncompressed, 2K/HD data from the Viper Filmstream Camera and save production metadata into each DPX frame.
This is saved on the DMAGs (digital magazines that, like film mags, hold the negative) as DPX frames, 24 individual frames per second and all easily accessible. So what we have on each DMAG when full is over 33,000 individual DPX film frames, the digital negative.
This is enhanced by the Viper’s ability to record raw image data with all camera correction settings switched off, allowing post to apply corrections to the raw data the way you want it to and not the way the camera would do this. Not all digital cameras available in the market do this, they still apply small amounts of correction to the image giving you less control over the image correction and grading process once in post.
 Tangent Stwo LUT Workstation Raw DPXFirstly set the camera up to record at full 4:4:4 colour space for eventual film print or DCI delivery at 1080 24p 4:4:4 2.37:1 Anamorphic (the Viper can crop to 2.37:1 but keep full 1080 lines of resolution).
Set the Stwo recorder up to receive the same signal so the Stwo is set to 4:4:4 1080 24p, the 2.37:1 image is recorded 16:9 full frame unsqueezed to the DMAGs. Once you can see a live image, then you are set and ready to film.
For on-set review and playback the DFR decks are able to review any shot instantly therefore saving the need to hire playback units with operators and all this at the full resolution at which you recorded. All takes are ready to view fully uncompressed and have no need to render out ensuring it is a real-time playback process. As the images are already captured as DPX frames straight to the DMAGs you do not have images wrapped in any inaccessable codec. Having no render times means that every take is instantly free to watch, at full resolution and in realtime.
 Dan Mulligan, DOPThe DMAGs will record the full 4:4:4 signal for twenty-two minutes per magazine, giving you roughly 33,000 film frames per magazine. Once the magazines are full you can remove them and then use an empty magazine to continue shooting. The setting up of the camera and the recording of the image is the easy bit – now we will go over all the processes to keep in mind for off-lining these images once you have filled your magazines.
Step 1. On-set viewing/print LUT workstation integrated with Tangent Grading Panel
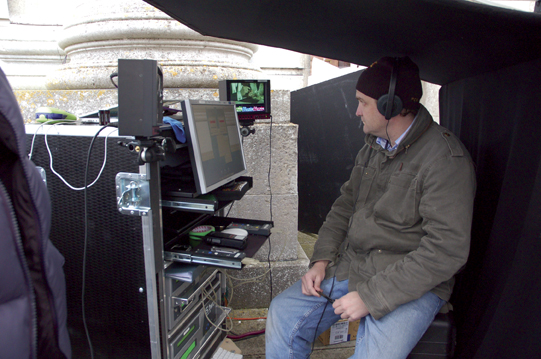
One of our newest developments here at Rogue Element Films is on-set LUT correction via this unique workstation. By combining the Stwo DFRs into the same rack system that can apply the LUTs we have created a seamless environment to shoot, capture and manipulate from one integrated unit.
Using Fetch to access the DMAGs, we can pull a DPX frame from the shot material and simply drag this into the laptop. By opening Iridas Speedgrade On-set software we can view the same DPX frame and apply our corrections to the image using a Tangent grading panel.
Once done, this LUT is then saved and applied to our on-set Grade1 24in LCD for viewing. The CineTal LCD also allows us to export this LUT to the SDI outputs on the monitor for everyone to view whilst on-set if so desired.
Pre-designed print LUTs can be used the same way and can also be adjusted on-set if the need arises.
Step 2. Offline to FCP 6.0.2 via AJA IoHD with Stwo iDock.
For all of our offline editorial we have gone down the ProRes route. By employing the AJA IOHD box we can now record a full offline copy of each magazine within 30 minutes of each magazine becoming full on-set to an external FW800 hard drive through a MacBook Pro running FCP 6.0.2.
The iDock system produces an FCP XML file that can be imported into FCP. This is done by opening up Fetch on the Mac and dragging the XML file from the DMAGs internal menu via iDock. This XML file holds all the metadata and all the scenes/takes that were recorded onto the DMAG. This means you get a direct copy of everything that’s in the DPX frames but at the ProRes 4:2:2 codec, hence saving storage space.
This process can be done on-set while still shooting and is an automated batch capture process. Once you import the XML file and then batch capture, everything else is all done for you, including any timecode breaks and any timecode recorded time of day.
After 30 minutes you will have a hard drive with all the information needed to start editorial. If you wish to work this quickly that’s fine but of course at the end of each day’s filming you can still have a hard drive loaded with all the material off-lined from all the cameras and ready for edit, timecode accurate to the master copies with no handles on each take.
Step 3. Reviewing of Dailies.
Once your offline is finished the iDock doubles up as a playout deck (VCR) for the DPX frames. Load in your required DMAG for viewing, list the shots, and watch the dailies either raw or by applying your LUTs from that days filming. As this is recorded data, you can access any take available instantly, no tape rewinding is required to find your shots and are viewable at full resolution completely uncompressed plus in real-time, meaning no rendering!
Step 4. Backing up the DPX Digital Negative.
Once you have viewed your dailies it’s now time to back up your digital negative by copying to LTO3 data tapes the shot material. This is achieved by loading your shot magazine into an ADock/LTO3 unit. The ADock is connected to an LTO3 tape library via SCSI. Load in a DMAG and back the shot material to its internal cache. Once backed up the ADock automatically talks to the Scalar 24 library and writes the shot data to the LTO3 data tapes. This is done automatically and requires little or no specialist knowledge, just back up to the cache and let the system do the rest.
Once you have backed up to LTO the ADock then empties the cache ready for the next DMAG. The production may require two copies of each for insurance bonding which again is done automatically.
These LTO3 tapes now have all the DPX frames captured to the DMAGs and can now be used to go online once you have your edit decision list from the offline FCP copies done earlier.
hat we are explaining here is the way that workflows will develop and mature as the use of these systems becomes more widespread. As it stands a lot is written about the potential capabilities of varying systems and workflows with little or no actual fact-based results to prove the claims.
As workflows and equipment mature shooting high end digitally will become that much more efficient. The role we see digital playing is as a quick and efficient process while retaining all our integrity regarding image quality and production processes. Why not bring editorial to the set? Why not generate LUTs on-set to take to post and begin the grading process?
Digital tools bring work sets to the forefront of capturing films. It’s up to the end users to wrestle with all the equipment available in the market to get their ideal workflow as well as sort out the kit that clearly works for them as opposed to the kit that clearly doesn’t.
DAN’S EQUIPMENT LIST FOR DIGITAL FILM
• 2 x VIPER Filmstream Digital Cinematography cameras
• 2 x STWO DFR Data Recorders with 5 x DMAGs per camera
• iDock and ADock STWO system integration
• ZEISS DigiPrime and DigiZoom Lenses
• ASTRO waveform monitors
• CINETAL 444 Look Up Tables (LUT) LCD and Waveform with SpeedGrade LUT software
• APPLE MacBook Pro with external FW800 Hard Drives (500Gb each)
• AJA IOHD input unit capturing Pro-Res 422 in SQ or HQ modes
• LTO3 Scalar 24 19.2 TB tape media Back-up solution

