Dimensions (For The Price Of Batman’s Cape)
Posted on Aug 2, 2011 by Alex Fice
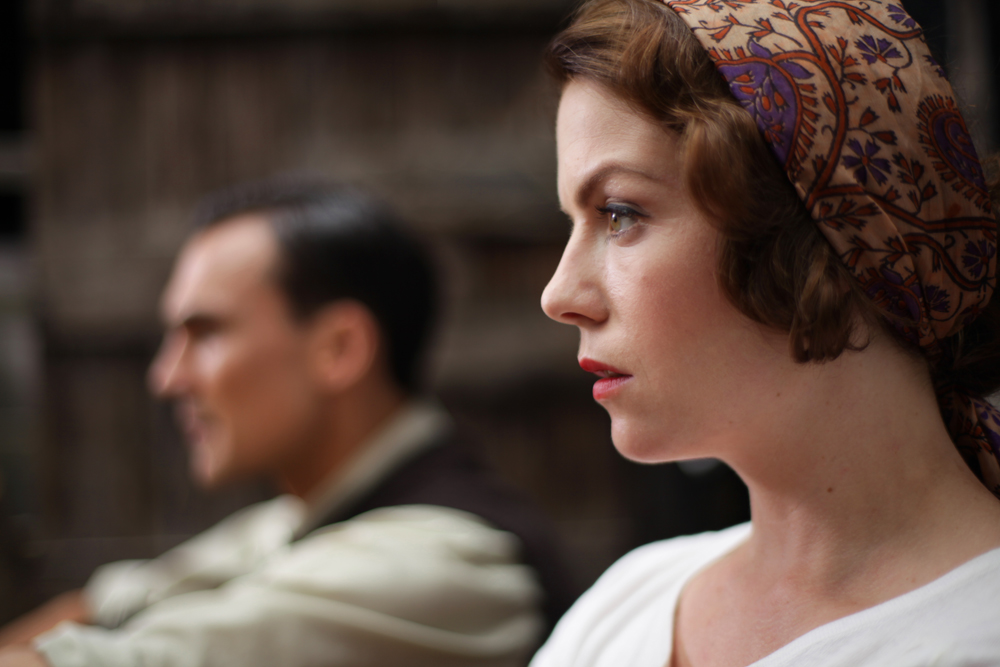
A scene from ‘Dimensions’Dimensions, photographed in Cambridge during last summer with Canon’s 5D and 7D, is the directorial debut of Sloane U’Ren, a production and set designer who has for many years harboured a desire to make a movie. This desire led her and her husband to sell their house to finance Dimensions. Sloane who has worked on many major movies including Batman Begins joked many times that her movie cost as much to make as Batman’s cape did in that film. DoP Simon Dennis and Editor/colourist Adam Garstone describe their part in production
Prior to Dimensions, I had previously shot many pop promos and shorts on the Canon 5D so I knew its strengths and potential weaknesses. This being my first feature with it and my first attempt at a ‘period’ project, I felt I needed to take advantage of its obvious strength – it’s select depth of field. I have to say, I am not a fan of the current trend of the ultra shallow depth of field look; I feel it’s a look that’s very easy to create and fine for ultra stylish projects like pop promos or beauty work in commercials. Yet I knew through tests I could reconfigure my F-Stops to be very close to a 35mm DOF table, especially as we decided early on we’d capture the story with a 2.35:1 ratio. Pro Motion Hire in London provided me with a fantastic and deliberately lean drama package for the 4-week shoot. For part of the shoot, Alastair Brown also supported us by supplying in kind one of his 2 metre Glidetracks, which we used for great effect on certain key setups.
When going into a project, I tend not to be overly inspired by previous films as it can potentially warp your ideas and take you down the wrong path of approach, especially a period film as they are littered with past conventions. I was, however, partly inspired by Vilmos Zsigmond’s hazy widescreen photography on the 1971 western McCabe and Mrs Miller, Wally Pfister’s simple but effective work on The Prestige plus certain Technicolour films of the 1950s for the strong reference to colour. This type of inspiration was purely a short hand for me and the director to build on and develop. The look and tone we eventually felt right was something classical and elegant with little need for big dolly moves. It was more about good old-fashioned composition, coverage and mood.
I don’t know about you but I find in ‘standard mode’ the blacks fall off very sharply in the 5D, much like certain film stocks. Yet knowing I could not always light and control every layer of a location within the schedule, I decided to create a user setting with ‘reduced contrast’ whilst keeping the ISO close to 100 for the majority of the shoot. This way I knew I had more of a handle on the blacks, noise and general contrast in post. For certain night work I did push the ISO closer to the 1000 mark, which I felt held up fine, something the camera is famous for.
Glass-wise, I ended up choosing a set of Zeiss Distagons with a Nikon adaptor, which I had used on a previous widescreen project with great effect. These ranged from 18mm up to 100mm, plus I brought in a Canon 70-200mm zoom, which was primarily used for B-Roll/B-Camera material shot and operated by local Cambridge film student Alex Turner. The Distagons do breathe a lot on long focal moves but for this project, I felt due to its more classical look, it would not be a hindrance. Filter-wise, I kept it simple – NDs to control the DOF and Polarizors for exterior days when I needed a little lift in the cloud contrast.
Because my background is in the discipline of 35mm, I still approach every digital project as a ‘movie’ and by this I mean I tend to not cut corners, especially with lighting equipment. It can make or break the look. For this film, I hired Gaffer Dave Hutton who had his own great compact package which ranged from 4K HMIs down to peppers plus a great selection of frames and silks, etc. I think I worked my way through his entire van by the end of the shoot. We almost made good use of the excellent LitePad Gaffer Kit (provided by Roscolab). Most of my work is done in prep and when I get to set I really enjoy working fast, on my toes and in the moment – it is how I was raised.
As an ex-editor, I am also working on two simultaneous levels, which can be helpful if the director needs help or reassurance on coverage or beats, etc. Lighting-wise, I used a lot of 8×8 and 12×12 silk frames and silver bounce for the exterior days as it complimented the pretty and dappled period tone. For the controlled interiors, I favoured Image 80s and HMIs softly punching through windows, if a day scene; and for night scenes, we often used or combined the gaslight and subtle moonlight depending on the emotional content. The gaslight tended to be heightened for more emotionally-charged scenes.
 Still from Dimensions
EDITING AND GRADING
A wise man (actually, Aussie producer David Lightfoot) once said, if you are making a low budget feature film, plan, plan, and then plan some more. For a micro-budget feature film like Dimensions this was even more true, and as the film’s editor it was my responsibility to plan the post-production workflow, starting with ingest of the Canon 5D Mk II footage on-set.
There are several products for capturing DSLR footage, from Canon’s own Final Cut Pro plug-in, to Red Giant’s excellent (but unfortunately named) Grinder. They all convert the camera footage to a more editable format and add timecode, however – for our workflow – they all have a few limitations. Our first hurdle was not having a full-time DIT on-set, so we needed a fully automated system that a camera assistant could use with little training. Secondly, I wanted a copy of the original H.264 camera files with the same timecode stamp as the ProRes 422 (HQ) files that we were using in the post-production chain, just in case we ever needed to go back to the original files.
Our solution was a piece of custom software, running on a MacBook Pro laptop close to the shooting locations. When a 5D CF card needed to be ingested, the camera assistant simply dragged the icon for the mounted card onto the icon for the custom app. The application copied the data to two separate G-Tech G-Safe RAID 1 hard discs before timecode stamping one of the copies – the other copy was designated as the ‘safe’ backup and was essentially read-only. The timecoded files were then automatically converted to ProRes (with the same timecode), ready to be sent to the edit suite.
The custom software checked and verified data at each stage of the ingest, warning the operator to retry the transfer if anything went wrong. Each transfer was copied into a dated and timed folder on the RAIDs, so it wasn’t possible to overwrite files by accident, and a paper log of each transfer was kept, so that the edit assistant would know what was in each folder. By the end of each shooting day, three copies of the raw camera files existed (two on-set and a third on a RAID in the edit suite). I’m proud to say, in an incredibly hectic 4 week shoot, filming over 2500 clips, with no experienced data wrangler, we didn’t lose a single shot.
Shots were logged into a custom Filemaker Pro database, with each clip’s record listing slate number, take, scene and so on, as well as the sound recordist’s and script supervisor’s notes. The same record holds both my rushes viewing notes and the Director’s comments, speeding the first assembly immeasurably and reducing the mound of paper maintained for each shot.
The edit suite is set up with the following gear:
- Mac Pro 8 core 2.8GHz, 16GBytes SDRAM, two NVIDIA Quadro 4000 graphics cards (for grading acceleration)
- Blackmagic Designs DeckLink HD Extreme 3D broadcast I/O card
- Sonnet eSATA RAID controller card
- 22TBytes external RAID storage
- G-Tech G-Safe 2TB for rushes and project archive
- Apple 30” Cinema Display
- NEC Spectraview Reference 271 Grading Monitor
- Blackmagic Designs HDLink Pro 3D HD-SDI to DisplayPort converter
- i1 Pro monitor calibration spectrophotometer
- Avid Media Composer 5.5
- Final Cut Studio (FCP 7)
- Adobe CS5 Master Collection
- A large number of Final Cut Pro and After Effects plug-ins
- Shake 4.2
- Mocha Pro
- Lightwave 3D v10
- Processing (a Java-based software environment) for custom image generation and manipulation
- Final Cut Server
- Mac Mini running Mac OS X Server
- DaVinci Resolve
- Tangent Wave grading control surface
- Logic Studio
- Filemaker Pro and Bento
- Kef Q10 Near Field Monitors
- Denon 5.1 Surround amplifier
- Roland M1000 digital mixer
- Sound Devices 422 analog mixer
- Toshiba 42” TV for Client Monitoring
- And there is a comfy sofa for the Director and Producer!
The edit was done in Final Cut Pro, splitting the film into reels as usual, both as this is how the film will be output, but also to reduce the effects of FCP 7 still being a 32-bit application and generally running out of memory all the time.
Although Dimensions VFX shots are being handled by The Senate, some titles and effects work were undertaken in-house, mostly in After Effects, Motion and Shake. Although Motion isn’t nearly as capable as After Effects, it is very useful for quick and dirty fixes – you can often get a clip into Motion, do what’s necessary and get it back out to FCP faster than you can in AE.
Finally, the grade is also being undertaken in-house using DaVinci’s fantastic Resolve for Mac which, a little like FCP, is totally unbeatable at the price, especially coupled with the Tangent Wave hardware control surface.
Adam Garstone


