Dead Boring
Posted on May 3, 2010 by Alex Fice
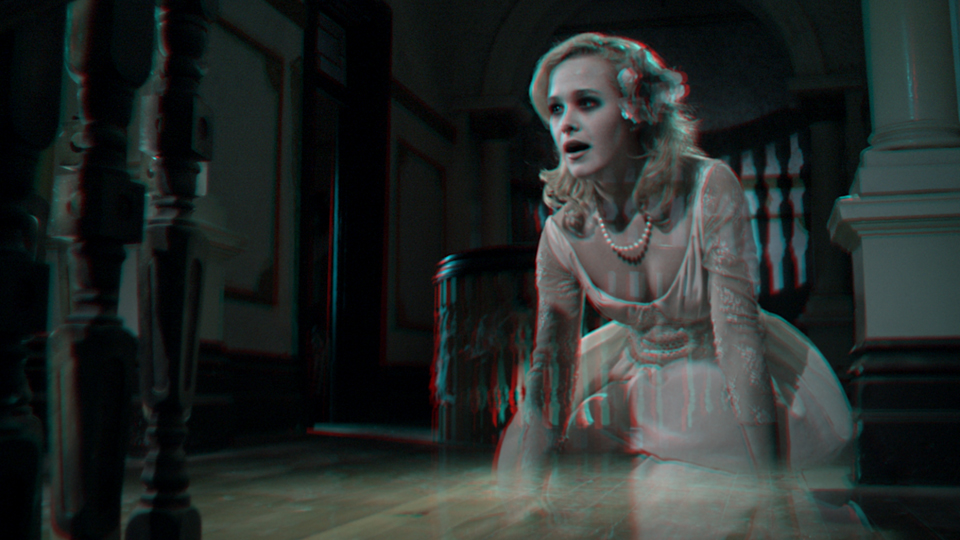
Dead Boring is a short film created by students studying at the prestigious Australian Film, Television and Radio School in 2009. The story follows the relationship between two ghosts that are stuck in a house with no one to haunt, poking fun at the possibility of sex in the afterlife. To visualize the story, director Dave Edwardz collaborated with Cinematographer Robert C Morton in order to create a stereoscopic 3D world that the ghosts inhabit. Not only is the project the first stereoscopic production to be completed at the school but the first stereoscopic production of its kind to be completed in Australia.
As the Cinematographer of Dead Boring 3D, my first experience with 3D was at the Royal Easter show which provided a few mild thrills as cars and rocks hurtled towards you, however the interest to shoot Stereoscopic 3D didn’t begin till around three years ago after having my first taste of live action polarized 3D, presented by Tim Baier. The images looked incredible, the volume and shape, which transposed the surrounding environment. The form it was given drew me in to the image. This was a turning point; I felt it was in my best interest to start learning about this technique within the craft of filmmaking.
Later on, I was fortunate to link up with Leonard Coster and Tom Gleeson, both of whom were taking an active interest in the craft. As such, material was compiled for the Australian Cinematographers Society (ACS) 50th Anniversary celebration. DP Geoff Boyle spoke at the session about his approach to stereoscopic on his recent project The Dark Country.
From this point, I felt there was a need to understand the theoretical, reading every book and forum related to Stereoscopic motion picture production. These included Lenny Lipton, Herbert McKay, Eddie Sammons, Ray Zone, Bernard Mendiburu, and CML to name a few.
These texts demonstrated the theoretical approach to creating volume, interpreting dimensionality, technical aspects of the rig and its application through lens choice, interaxial, parallax and lighting, psychology, screening format limitations and basic post production, relating to film and digital acquisition
Next it was all about analysing every 3D film our team could get our hands on, interpreting the various aspects of 3D and their use in live action drama.
Finally was testing. No matter how much you can read, it will never prepare you for the actuality of the situation. Initial testing began with side-by-side consumer cameras with director David Edwardz, looking at the feasibility of VFX in a stereo environment – finding faults and working out techniques to rectify those faults. In the week prior to the shoot, I devised multiple tests, which worked through every interaxial value, and every lens – applying a roundness value for shot sizes, exposure, parallel v converged, wardrobe and actors screen tests. This was completed alongside all the other tests one would normally complete prior to going into production.
After completing tests, I was confident going into production that we could shoot 3D and remain true to the rules without compromising the need for long setup times.
The decision was made to shoot parallel with a locked off camera for each effects shot. Interaxial distance was locked with fixed convergence translated in the Silicon DVR software to calculate our depth bracket. The amount of 3D was based on what the scene entailed.
The project could not have been possible without the support of a lot of people. This film was being completed as part of my Graduate Diploma at the Australian Film, Television and Radio School. As such the budgets could not sustain the requirements to shoot Stereoscopic.
When we put the word out to my former employer John Bowring of Lemac, he was very supportive of what we were trying to achieve. He sponsored alongside Leonard Coster of Speedwedge, supplying the rig and technical support, Warren Lynch of Intercolour who completed the grade, Cineform who supplied the Final Cut Pro Plugin – Neo3D, Silicon Memory who supplied the RAID-5 Drives for Post production, JVC who leant us a 3D LCD screen for a week for final viewing of material prior to VFX lockoff and Animal Logic for a projection screen and guidance.
Throughout the entire process of this project, we felt like we had been blessed. The kindness of people in the industry to get this project off the ground and running was incredible. We really felt like we had something special.
Alongside our sponsors, my camera crew worked incredibly hard to complete the film – 1st AC Charlie Sarroff, 2nd AC Joe Michaels and Stereoscopic Assistant/Data wrangler Jimmy ‘James’ Wright. These guys were very supportive during the process, always offering up ideas to keep things moving along, whether it was downloading data or making the camera system a little more user friendly, there was always a dedication to what they were doing.
Finally during our postproduction stage, a few people lent a hand in the final stages of VFX, completing Stereoscopic transforms and other related tasks to get us over the line. This project would never have been possible without the support of all these individuals.
Initially we were thinking about using the RED camera due to the resolution factor. Knowing we were going to finish in HD meant we wanted to have a considerably higher Bayer pixel count in order to maintain a clean and sharp image at the end of the day – particularly as we were going to be shooting in relatively low light conditions.
When we started to do the sums for how much data we were going to need based on the resources that were available to us, it seemed less and less feasible we would be able to complete the project.
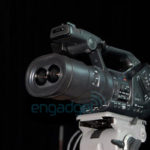
Finally John Bowring suggested we look at the Silicon Imaging 2K System. Recently adapted to allow for both streams of RAW Bayer data to be recorded separately (.siv) then re-encoded together into a Single Cineform QuickTime interleaved file inclusive of convergence metadata*. This QuickTime could then be edited through Final Cut Pro using the Neo 3D plug-in, where the editor, Emma McKenna could flick between 2D and Anaglyph – Amongst other standardised versions such as over/under and side/by/side. Basic Left Eye-Right Eye corrections could be made in the Firstlight add-on software to tweak colour correction, convergence, vertical and rotational disparity. This metadata would immediately re-apply to the footage and be accessible in Final Cut Pro.
Upon completion of editorial we were able to output four DPX streams for VFX before merging into two streams for colour grading.
After weighing up our options, the Silicon Imaging camera didn’t quite have the resolution or S/N that the RED did, however it ticked all the other boxes. It was certainly the right piece of kit for the job.
What the Silicon Imaging/Cineform system has achieved is a means of simplifying the added components of Stereoscopic production into a self-contained software based workflow. This is an important step in targeting mainstream usage in the industry.
The benefits this system had to offer were as follows:
• Parallel alignment on set of the two cameras using its anaglyph mode to compensate mechanically for Vertical, Horizontal and rotational disparity which took less than five minutes.
• Live recording and playback view in 3D on set using anaglyph or dual output for FULL POLARISED 3D
• User adjustable frame lines for our 1920×1080 gate
• User adjustable grid lines on our viewing system, to calibrate our depth bracket by prevent horizontal disparity from becoming too much for maximum size viewing output. For us we shot for a 30’ horizontal screen = 0.66% (12px) offset with a 1% (19px) tolerance at the furthest point and a 3% (57px) tolerance at the nearest point.
• Find exposure on the left eye using my meter, then adjust the right eye to match up on the dual histograms or the wiggle depending on the shot**
• Translating convergences in the computer system, which is included as metadata in the Cineform file – necessary when shooting parallel.
• Line synchronised shutters – very important in 3D
The cost of shooting and post producing 3D is slightly higher; this is inclusive of on-set shooting times, equipment, postproduction and VFX.
We took a much simpler approach to shooting 3D than most other films, we did not adjust interaxial or convergence dynamically, and we had no dolly or crane moves throughout shooting – everything was a lockoff.
Geoff Boyle once said that Stereoscopic filmmaking takes around 30% longer to shoot that 2D, which seems like a fair assumption. Certainly with smaller, more flexible cameras that can be controlled externally, utilising a zoom lens will help speed up the process.
• Additional time on set when shooting 3D is mainly taken up by:
• Mechanical calibration of the two cameras.
• When setting up a move – finding marks for interaxial and convergence (which can be done whilst finding focus).
• Moving the physical camera unit around (which is all dependent on the physical size of the rig)
• Not having an effective viewfinder or monitor on camera – mainly due to computer output ports.***
• Looking out for possible retinal disparity and making appropriate changes to either camera angle or physical set pieces.
• Additional lighting due to the speed of the cameras and the one stop loss from the mirror.
• Relying on a computer to drive the system, dealing with the typical issues associated with operating systems and computer ports.
• Data management, data storage and data backup all being done by the one machine which would occasionally tie up shooting.
Certainly a lot of the on set issues will start to be minimized by having smaller cameras that record on board, smaller and lighter rigs, shooting parallel on an over scanned sensor and adjusting the interaxial remotely whilst converging via on board camera software via remote links as not to tether the camera.
The cost in post production is increased as every shot should be treated. Unlike animation where both viewing cameras are perfect – live image capture requires compensations for lens distortions between the left eye and right eye. This can include vertical, horizontal and rotational distortions, flares, convergence animation and tweaking, corner pinning right eye to match lens distortion of left eye, matching colour and contrast differences between eyes due to lenses and camera systems differences.
Additional costs also need to be considered when editing, cheap options can be sought by manually embedding images together such as side/by/side or over/under image – which presents many limitations. Other options include using dedicated software or hardware – which has the benefit of 229/01/10/3D viewing.
Finally any compositing needs to be treated as two streams, so whatever great systems you have used up until this point now need to go into a well managed system. All work needs to be done in duplicate – an offset from one eye to the other can only present good results in noncritical elements. Newer tools are coming onto the market such as Ocula, which will assist in easing the workflow. With Stereoscopic 3D, you can’t simply fix it in post.
Giving an exact figure of additional cost is hard to equate, as there are so many factors, which come into account. The cost to shoot 3D is very likely to decline in the next few years, particularly as experience increases, alongside software and hardware tools becoming more available to a wider market. We are still in Digital 3D infancy; Moore’s Law will hopefully change that quickly.
The workflow did allow us to have 3D rushes to view, however it had its limitations. Firstly because we were shooting 2K@25fps – Our AJA or Blackmagic cards did not support live output at this frame rate/resolution. This meant viewing on the schools cinema screen would only have been possible if all the rushes had been converted over to a 1080P format – unfortunately we did not have the time nor the resources to make this possible.
In the end we viewed our rushes out of Final Cut Pro as Anaglyph on a 17in broadcast monitor. This is by no means ideal for accurately of viewing the 3D effect. The larger the screen means larger disparities. I had to trust my calculations.
With regards to our workflow, we tested everything in the beginning, however certain details were worked out as we went – mainly due to the lack of time and personnel to test in pre-production.
Issues that we came across in the workflow included:
• Concatenation created by multiple file generations due to unsupported file types
• Network speeds. Utilising the schools internal network to read files off the server onto multiple machines cause continuous grief. This problem meant that we lost many days due to incomplete renders, corrupted renders, slow working on individual machines. Certainly as files get larger, this problem will exacerbate.
• Finally, a major problem we had to deal with in post production was basic matching between the two cameras. Each camera behaved differently due to their internal RGB offsets, resulting in different gamma and noise levels.
All final Stereoscopic tweaks were completed in Nuke, due to its ability to handle multiple streams and merge them together for viewing. Outputs from Nuke were all Final Rendered to 1920×1080. Final grading was completed on a Nucoda Film Master. The final projection was all set up the week before using Silver screens, dual projectors, polarisers, Matrox boxes and QuickTime player.
The only way to answer that question is ask another question and that is: “What are you making?” Are you making 3D, or are you using 3D to make a film? From our point of view, 3D is a tool like any of the other devices we use to help tell the story. Its primary function is there to enhance something else and so from that point of view we can only really judge it in its effectiveness to do so.
Previously, 3D has been used only as a gimmick because of its very obvious ‘Wow’ factor that adds another dimension to cinema. Some of the things it does well are that it can exaggerate depth, send objects into audience space and make you believe that the characters are right in front of you. However, what we began to notice from our research is that there are many more subtle effects that are equally impressive but less obvious. Sometimes you may want to wow an audience, sometimes not… but it should come down to what the story calls for. These types of choices will become far more common place as 3D filmmaking begins to mature.
On Dead Boring, the idea of immersion was important. The film is about two ghosts trapped in a house and we used the stereo effect to take the audience into the space of the house, putting the audience in the shoes of the main characters. In some ways, the audience is supposed to feel trapped inside the house alongside the ghosts as the walls extend around them. The stereo effect exaggerates the depth of the image and makes it feel even more desolate than a flat 2D image normally would.
So in creating our 3D world, we took a fairly restrained approach to 3D that was about capturing space. What became important was capturing the best possible depth and roundness for each image so that everything was clean and would fuse nicely in stereo. Getting it right at the time of shooting would hopefully save big headaches down the pipe, and as we were working on a VFX film, that was very important to us. Both cameras had to be calibrated perfectly to match both left and right eyes. This seems like a no-brainer, but there were a lot of things could go wrong and the extra time had to be taken to ensure the equipment was working correctly otherwise the 3D simply wouldn’t work.
To make the stereo images more appealing, traditional compositional devices were used that the stereo effect would then enhance. This included but was not limited to production design, staging, lighting, etc. We found that when an image was working well compositionally in 2D, the 3D would be more effective. Furthermore, we took time to ensure that the right lens / distance / interaxial ratio was used in order to maximise the greatest sense of roundness we could achieve in each image.
On such a tight shooting schedule, none of these ideas could have been utilised if it hadn’t been for such rigorous testing in the lead up to the shoot. Many of these issues/settings had been isolated early and we knew all the information we needed to in before we even got on set. It really saved the film and allowed us to be more creative in the heat of battle rather than restricted by the technology.
Next time begins with the ideal technical solution then transposes to the creative possibilities which open up in its wake, manufactures need to move with these challenges. I would like two units on set, a smaller rig which can mount on a steadicam which utilises a fixed prime lens, another which is slightly larger which utilises a wide to medium zoom lens – Both units shooting Parallel.
The units would include the following:
• Much higher pixel resolution Bayer sensors than finishing format (3k minimum for a 2k finish).
• Physical sensor size (larger than 16mm, smaller than 35mm) with additional over scan area.
• Higher ISO value (to compensate for mirror) with good dynamic range (to add image detail) and low noise (to eliminate planar noise).
• Compact cameras (DSLR size) with on board recording/monitoring.
• No tethering, or umbilical chords – everything wireless.
• Remote dynamic interaxial which records values into the metadata stream as a single file.
• Remote convergence which is recorded as metadata on camera.
• Remote HD monitoring which can be viewed as 3D and 2D
• Remote focus, iris and zoom piggy-backed from a single linked controller (like the C-Motion).
• Lens LUTs that can be input back into the camera as metadata – this will eliminate post production geometry correction, colour differences and lens tracking correction.
Creatively, we would like to use some of the techniques that I have discovered along the way and were not able to adopt due to the nature of the project.
These would include:
• Using more movement within the frame to creative greater depth cues.
• Create blocking that utilises more negative parallax (elements coming into audience space)
• Using up-scaling to create rounder elements by shooting wider with a larger interaxial to gain more perceived shape, then marginally scaling up to correct for shot size requirements – to be tested!
• More testing in more diverse situations.
• Allow for longer setup times on set.
• More diverse angles which really heighten the 3D perspective for the audience.
• Having more objects come into audience space such a chandeliers, walls and other objects to alter physiological experience
• HYPERSTEREO – maybe the next remake of King Kong!
With all things considered, as our first Stereoscopic project, not having an unlimited budget, shooting 17mins in three days, we completed something pretty amazing. Please be sure to check out http://www.deadboring3d.com for more information on the film and Stereoscopic 3D, plus a behind the scenes documentary from start to finish to finish of production.


